Transformational Process of Flowers to Pigments

Introduction
Whenever a modern chemist creates a unique molecule that does some state-of-the-art thing, my money will always be on nature having done it first– and dyes are no different. Synthetic dyes make up the majority of what colors our material world, but that wasn't always the case. One family that has made it their life's work to bring back the practice of using plant-based materials and natural dyeing techniques is the Yoshioka family. They run a 200-year-old family dyeing workshop in Kyoto, Japan [4]. Their workshop, at one time, transitioned from natural to synthetic. However, Sachio, the 5th generation head of the workshop, was motivated to return to the family's roots and produce all products solely from natural materials.
By relying on only natural materials, more considerations have to be made. Who will supply you with the raw materials? When are they in season? What to do when encountering the anticipated variance? It is because of these challenges that make natural dyeing is unique and special. The Yoshioka family, for example, worked with farmers directly to supply their need for specific plants such as benibana for red and gromwell root for purple [5]. Considering the seasons and what weather works best takes a certain level of tacit knowledge and closeness to the ingredients. This is often forgotten or deemphasized with the ease and accessibility of today's store-bought dyes. What to do when encountering challenges becomes a lot easier when adjustments are already expected.
The use of natural pigments is not unique to Japan. Safflower is one plant I have seen written about in Japan, Korea, and China. There are some specific functions seen in each country. In Korea, the pigment was used to create daubs on temples and on the back of children's heads to keep demons away [3]. However, in China, it was often used to make rogue for courtesans [6]. The text of the recipe from Qimin Yaoshu can be seen below. The techniques seen in that recipe are very similar to those Yoshioka's family now uses, as seen in the video also available on this page.
Omizutori Ceremony

Figure 1: Brandishing of the Taimatsu Torch in the Omizutori Ceremony
Omizutori, or sacred water drawing festival, takes place in the Nigatsu-do temple in Nara, Japan, and began by Imperial decree in 752 AD. One of the original purposes of the ceremony was for the Buddhist priests to repent their sins and intensify their piety [1]. It is also a time to make prayers towards the eleven-faced image of Kannon to protect the nation and for a bountiful harvest. One of the offerings to Kannon are paper flowers representing camellia blossoms. The Yoshioka Dyeing Factory has produced these flowers for the ceremony for over 40 years. One event of the festival is the brandishing of the Taimatsu torch. It is believed that the burnt embers bring health and happiness and can act similarly to a talisman [1]. It is still held today as an annual rite from March 1st to 15th (based on the new calendar).
Primary Sources and Translations
-
This video provides information surrounding safflower pigment production, what the paper flowers should look like, and the Omizutori Ceremony itself. The film and interviews follow Yoskioka’s family's journey in rediscovering their family’s past in dyeing using natural materials. The methods used in the video is how their family has always done it and is consistent with other historical records such as the one presented bellow from Qinmin Yaoshu written in circa 535. [7]
-
“Grind the safflower until it is mashed; run it through water and put it in a cotton bag to squeeze out the yellow pigment; grind the flower even more and run it through clear, acidic rice water; again, squeeze yellow pigment out of the cotton bag…… Prepare burnt chenopodium ash (use wood ash as a substitute); pour bioled water into the ash and acquire its clear portion; rub the flower (for more than ten times until the transformation is completed); squeeze it in a cotton bag and collect the juice in a container; get two to three sour pomegranates; take out their seeds and crush them; mix with a small porion of acidic rice water; put in a cotton bag and squeeze out the juice, which is added into the flower juice (use good quality vinegar mixed with rice water as a substitute for sour pomegranates; use clear, highly acidic rice water if no vinegar either); put in rice powder as big as a jujube (the color will be too white if too much powder is added); ….stir thoroughly and cover the container; wait until night time and pour the upper clear portion until the mixture becomes rich; pour the condensed mixture in a cotton drawstring bag and hang it up; wait until the next day when it is half dried; take it out and twist it into small petals; air dry it and it is done.” [2]
-
Beni Red using Safflowers
Day 1:
Wash and pound Safflower petals using cold water and steep overnight in a water cooler dispenser. To keep cold use 1/2 water and 1/2 ice cubes.
Day 2:
1) Squeeze yellow colorant out and keep for later use by setting up in an open container to start the evaporation process.
2) Make a basic solution by mixing water and soda ash into the crushed and strained petals.
3) Agitate with gloved hands for 15 minutes and allow to sit for at least two hours
4) Squeeze out using cheese cloth and collect the red colorant
5) Add citric acid to the red liquid along with strips of raw linen and allow to sit overnight.
Day 3:
6) Make a basic solution again with water and soda ash and add dyed linen pieces to remove the red pigment from the strips.
7) Add strips back to the acidic red solution and repeat the process until as much red pigment is removed from the liquid as possible.
8) To the recovered solution add enough citric acid to precipitate the pigment out.
9) Pour through cheesecloth over a piece of silk and allow for precipitate to settle on the piece of silk overnight.
Day 4:
10) Scape off the precipitate from the silk and collect it in a separate container.
11) Transfer a portion of pigment to a separate container and water it down.
12) Add soda ash to dissolve pigment then add more citric acid to get the right color.
13) Use hake brush to paint the washi on both sides
14) Using two hangers bound together with rubber bands, sandwich the top of the paper and hang to dry. Place a towel underneath to ensure any dripping doesn’t stain the carpet.
Day 5:
15) Determine if the dried paper is the desired color or if additional layers are needed.
Jasmine Yellow using Safflower
1) Using Hake brush paint the yellow liquid over paper and hang to dry using hangers.
Paper Flower Production
1) Make prototypes using construction paper by imitating the flowers on display in the living colours exhibit. Trial and error strategy.
2) Repeat with the produced pigmented paper.
Experimentation

Beni Red using Safflowers
Day 1: Releasing the Yellow Colorant
Added all 500g of the safflowers to the cooler with enough water to cover the petals and around 4 cups of ice cubes to keep the mixture cold. Agitated the mixture with gloved hands for 15 minutes then add the rest of the ice to let steep overnight. I incorporated the ice into this process because it was mentioned this process was purposely done during winter because it is better under cold conditions [7].


Day 2: Separating the Red Pigment Part 1
Using the built in dispenser on the cooler, the yellow colorant was squeezed out into a large tub and set to the side for later use. The strained petals were moved to a separate container. A basic solution was then made by mixing water and a couple table spoons of soda ash until it was completely dissolved. Wasn’t sure how much to use, but unlike with the acid, adding too much of the base won’t hurt, therefore I used more than was probably necessary— just to be safe. The basic solution was then added into the strained petals where it was mixed with gloved hands for around 15 minutes. The mixture was allowed to sit for at least two hours. Once finished the red colorant was collected and squeezed out of the petals using a cheese cloth.


To the red liquid a sprinkling of citric acid was added. Upon addition the citric acid reacted with the sodium carbonate and bubbled releasing CO2. I was careful not to add too much so the red pigment wouldn’t precipitate out. I then cut up strips of the cotton and added them to the solution and allowed it to sit overnight. Since the red pigment is not water soluble in an acidic solution, the red pigment will be absorbed by the cloth.


Day 3: Separating the Red Pigment Part 2
Another basic solution was made with water and soda ash. Since the red pigment is water soluble in basic conditions the pigment would leave the dyed cotton strips and move into the basic solution. I added the strips back to the red acidic solution to pick up more red pigment and repeated the process until as much red pigment was removed from the liquid as possible. Decided when to finish based off how light the acidic solution became and how long it took for the cotton strips to soak up the red.


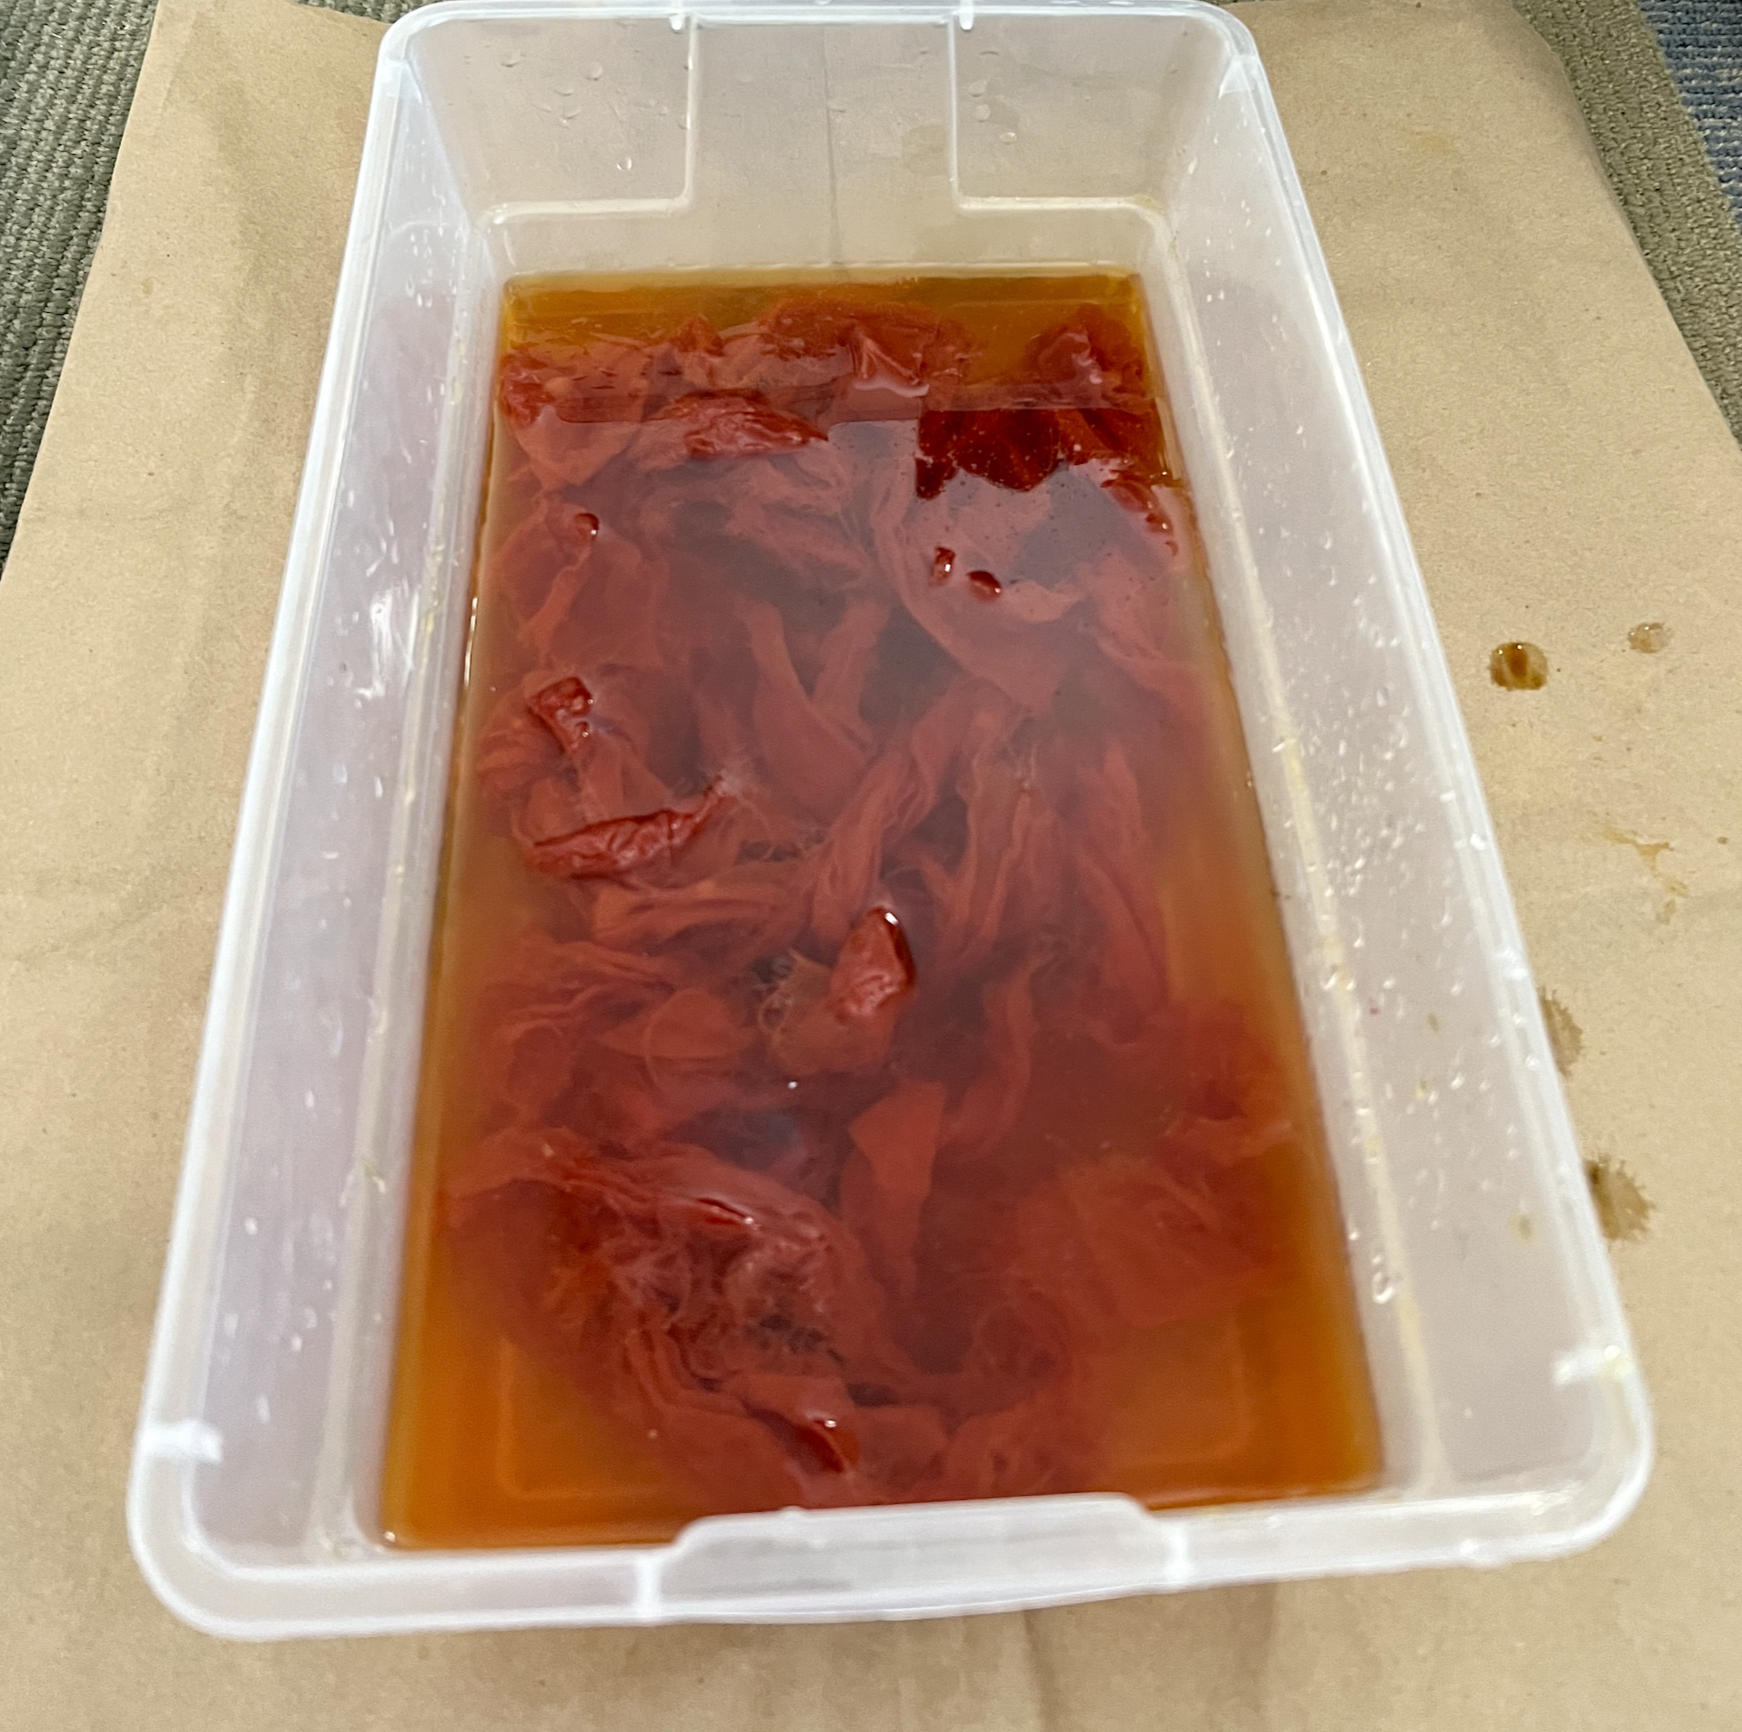
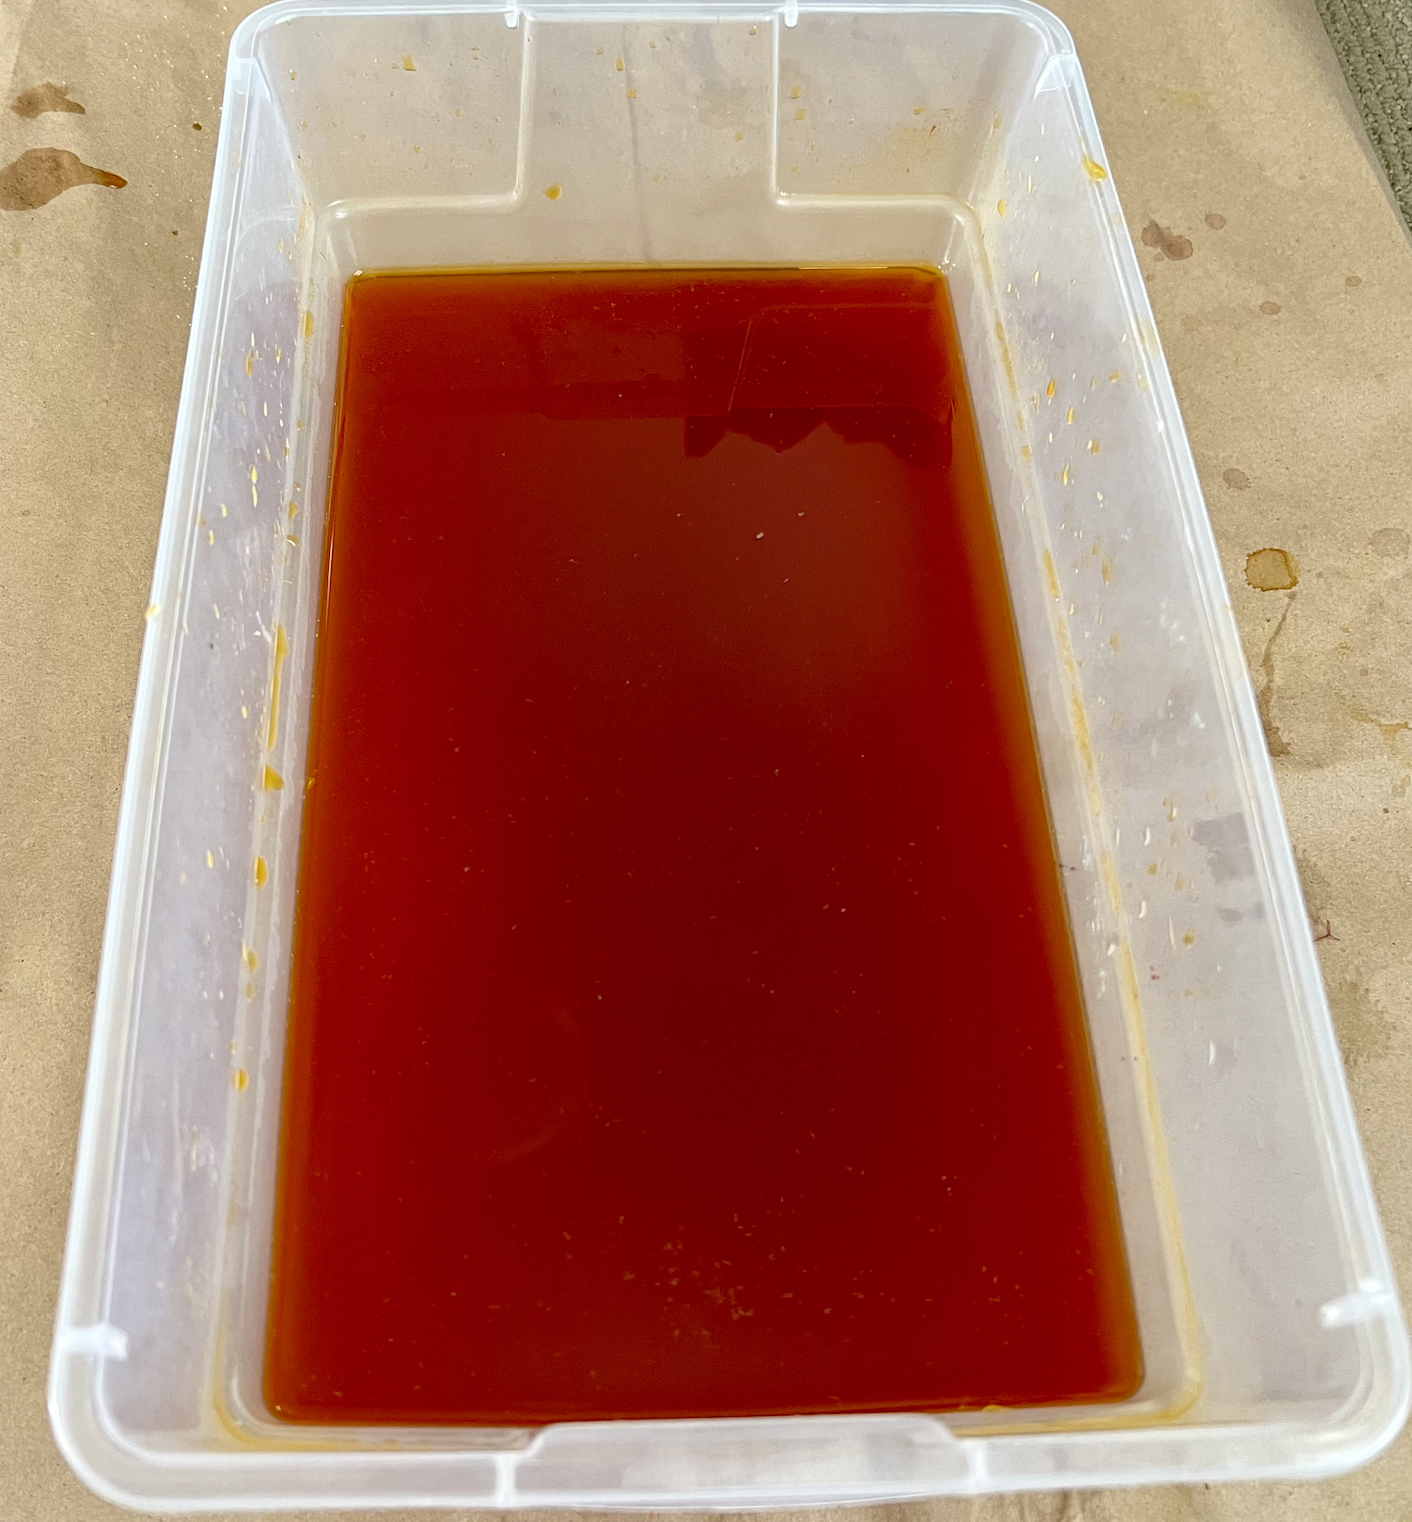

To the recovered solution I added quite a bit of citric acid— just to be sure the pigment precipitated out. I swirled the solution around to visualize the particles and to check how cloudy it became.
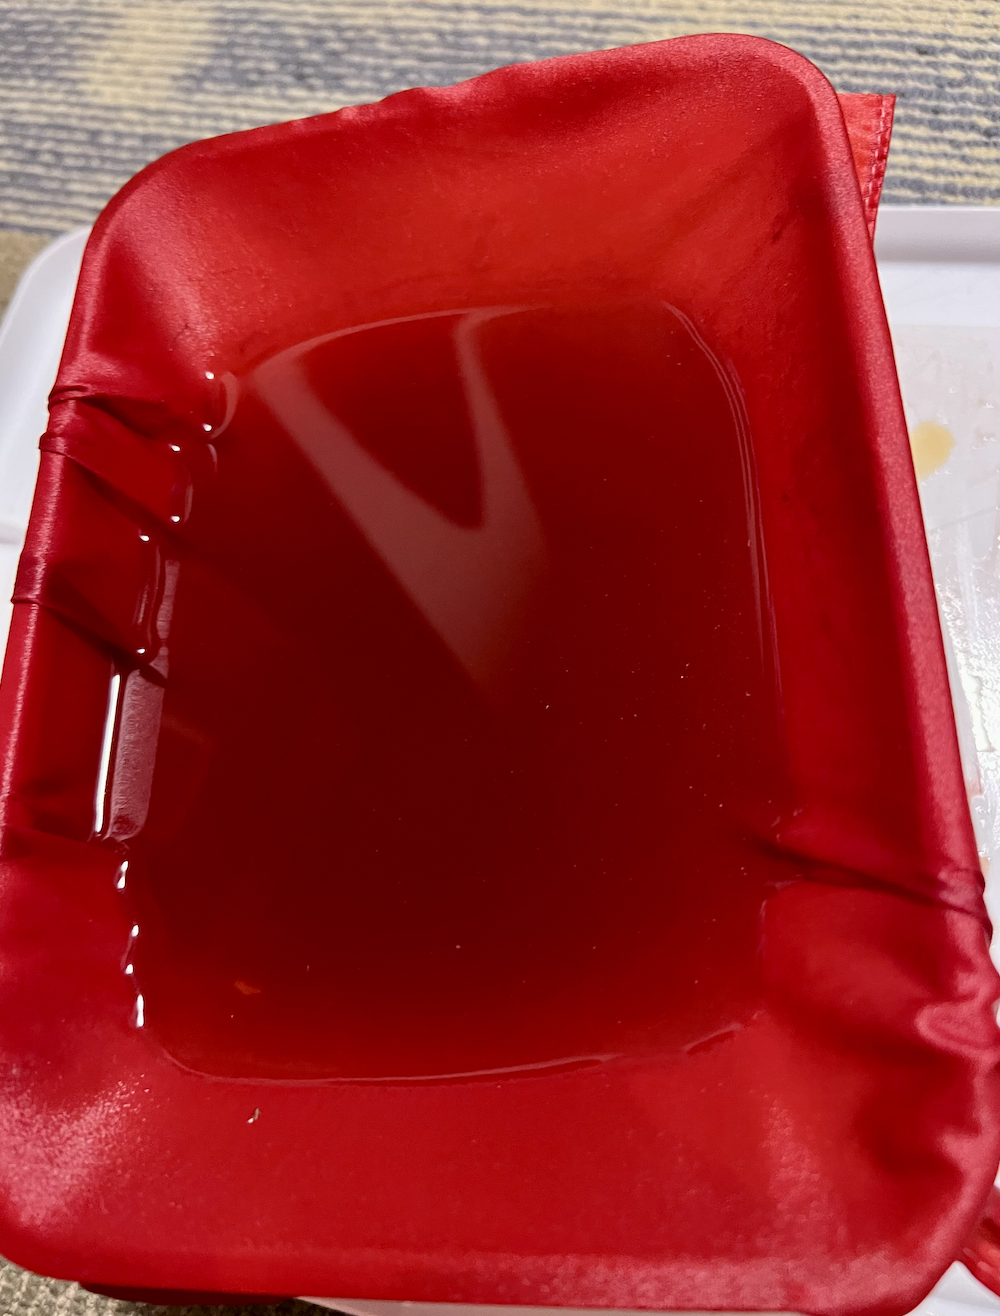
I then poured it through a cheesecloth over a piece of silk and allowed the pigment to settle on the piece of silk overnight.
Day 4: Collecting and Applying the Red Pigment
I removed the silk from the bottom and scraped off the particles from the silk and transferred it to a separate container. I noticed during the removal process of the silk some of the particles got redistributed into the solution so I tried a new method where I secured the silk to the top of a container and poured the solution over the top to perform gravity filtration. This technique was able to remove all of the solid pigment from the solution. I repeated the scraping process and collected as much pigment as I could.



To the collected pigment I added enough soda ash to redissolve the pigment then add more citric acid to get the right color.


I used a hake brush to paint the washi on both sides. Tried to angle the brush as much as possible to prevent the lifting of the paper’s fibers.
Used two hangers bound together with rubber bands to sandwich the top of the paper and then hanged them to dry. The color was good enough that I didn’t think they needed another layer.

Jasmine Yellow Using Safflower
I checked pigmentation of the discarded yellow liquid by painting watercolor paper using hake brush.


The pigmentation was strong enough that the liquid did not need to be reduced further. Using Hake brush I painted the yellow liquid over the Okawara paper and hung it to dry using two hangers. Since watercolor paper is less absorbent by design it took more layers than the Japanese paper to get a saturated color.
Paper Flower Production
By analyzing the flowers from the Living Colours exhibit I was able to determine that there were five petals (3 red and 2 white). Also, that in the center there were strips of yellow with a white circle piece in the very middle. My imitation process started by blocking out the colors then refining each one to what I think will work best.
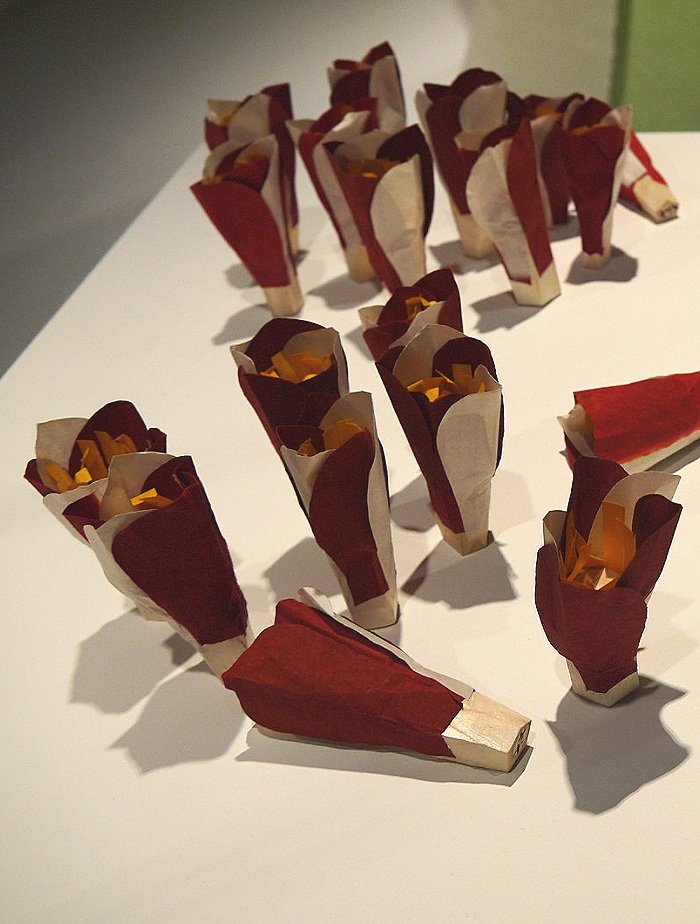


Instructions:
Petals: Fold paper small rectangles in half then cut into a general “petal” shape. Use the first one as a template for the rest so they are exact copies. Angle at the base of the petal will determine how “open” the flower will be when finished. Tape the base of the petals together creating a pentagon.
Stamen: Make slits into the large yellow rectangle leaving at least a half centimeter of space between each cut and the edge.
Center Piece: Cut two squares out from thick paper. Cut one of those squares into four more squares. Glue all four of the mini squares on top of one another to create a small “cube”. Once dried, cut the stack into a circle. Repeat with the larger square. Glue the smaller and taller circle in the center of the larger circle.
Base: Trace the pentagon base of the put together flower. Outline a larger pentagon around the first one. Connect the vertices of the inner and outer pentagon. Cut out around the outer pentagon and make slits over the connecting lines. Fold along the inner pentagon and tape the walls together to get a cup like shape.
Assembly: Glue base around the assembled petals. Role up the Stamen (a little thicker than a straw) and tape it to the center of the flower. Role up thick paper skinny enough to fit inside the stamen and around an inch in height. Glue it to the base of the flower in the center of the stamen. This will be what you attach the center piece to using rolled up tape.
Reflection
I was surprised by how closely I was able to follow the steps and get similar results as Yoshioka’s process. One ingredient mentioned in both the Japanese and Chinese sources was the juice from jujube or sour plum. I couldn’t get my hands on it but found in other modern sources that you just need something acidic enough to get the red pigment to precipitate, which is why I used citric acid instead. Throughout the process, I was worried that one thing would go wrong and that I wouldn’t be able to get any product in the end. Mainly because it was prefaced that it takes 1 kilogram of safflower to produce enough pigment to dye a single sheet of paper (albeit larger than your standard printer paper), and I only had half of that. That fear did not go away until I put the cotton pieces into the “red” colorant solution, and they started to pick up the red pigment since even the supposedly red solution was still yellow.


It was also through working with the material that I discovered some unique properties of the red pigment safflower produces for myself. Specifically, that it can change shade and color depending on the pH level. The lower the pH (more acidic), the pinker it is in color. When the pH is higher (more basic), it turns purple or orange depending on the material the pigment is on. It is also by doing that I was able to actually learn and understand how to do certain steps. This relates quite closely to tacit knowledge. For example, even by watching a video, I couldn’t figure out how to brush on the pigment without disturbing the paper’s fibers until I actually did it myself.
If I were to do this again, I would like to use a different paper. I could not find out what paper was used to make the paper flowers, but I assumed it had to be made from kozo since the paper would have to be strong enough to withstand the dyeing process. However, the only available paper was a blend of kozo and sulphite. In paper-making processes, sulfite softens fibers and breaks down lignin from cellulose. I can only assume that this was one of the reasons I had a problem with “pilling” and the paper being more fragile than I would have liked.
Works Cited
[1] Boyer, Martha, and Jikai Fujiyoshi. “Omizutori: One of Japan’s Oldest Buddhist
Ceremonies.” The Eastern Buddhist, vol. 3, no. 1, Eastern Buddhist Society, 1970, pp. 67–96, http://www.jstor.org/stable/44361227.
[2] Jia, Sixie, Qiyu Miao, and Guilong Miao. Qi min yao shu yi zhu. Di 1 ban, di 5 ci yin
shua. Zhong guo gu dai ke ji ming zhu yi zhu cong shu. Shang hai: Shang hai gu ji chu ban she, 2014.
[3] Landis, E. B. “Native Dyes and Methods of Dyeing in Korea.” The Journal of the
Anthropological Institute of Great Britain and Ireland, vol. 26, 1897, pp. 453–57, https://doi.org/10.2307/2842016. Accessed 26 Apr. 2022.
[4] “Natural Washi Dyeing with Yoshioka Sarasa at Japan House London.” Japan House
London,https://www.japanhouselondon.uk/discover/natural-washi-dyeing-demonstration-by-yoshioka-sarasa/.
[5] “Safflower.” Flextiles, 9 Apr. 2019, https://flextiles.wordpress.com/tag/safflower/.
[6] TROMBERT, ERIC. “Cooking, Dyeing, and Worship: The Uses of Safflower in
Medieval China as Reflected in Dunhuang Documents.” Asia Major, vol. 17, no. 1, Academia Sinica, 2004, pp. 59–72, http://www.jstor.org/stable/41649885.
[7] Yoshioka, Sachio. “In Search of Forgotten Colours - Youtube.com.” Victoria &
Albert Museum, True Art Films & NHK Enterprises, Inc., 6 June 2016, https://www.youtube.com/watch/?v=7OiG-WjbCQA.
Image Citation
Figure 1: Murakami, Eiji. “Omizutori Ceremony.” Visit Nara, 19 Sept. 2020, https://www.visitnara.jp/venues/E02017/. Accessed 25 Apr. 2022.
Figure 2: “'Living Colours: Kasane' – an Exhibition on Yoshioka Dyeing Workshop /Toothpicnations.” Toothpic Nations Ltd, 11 June 2019,
https://toothpicnations.co.uk/my-blog/?p=35979.
